Saturday 26 January 2019

Vintage Tea Time

Some of you will be aware that it was my birthday a few weeks ago.  I was very fortunate to be spoilt massively by a very dear friend who treated me to the new PaperArtsy ScrapCosy release.  You can see the full release here and buy them here.

I really couldn't wait to get playing with this release.


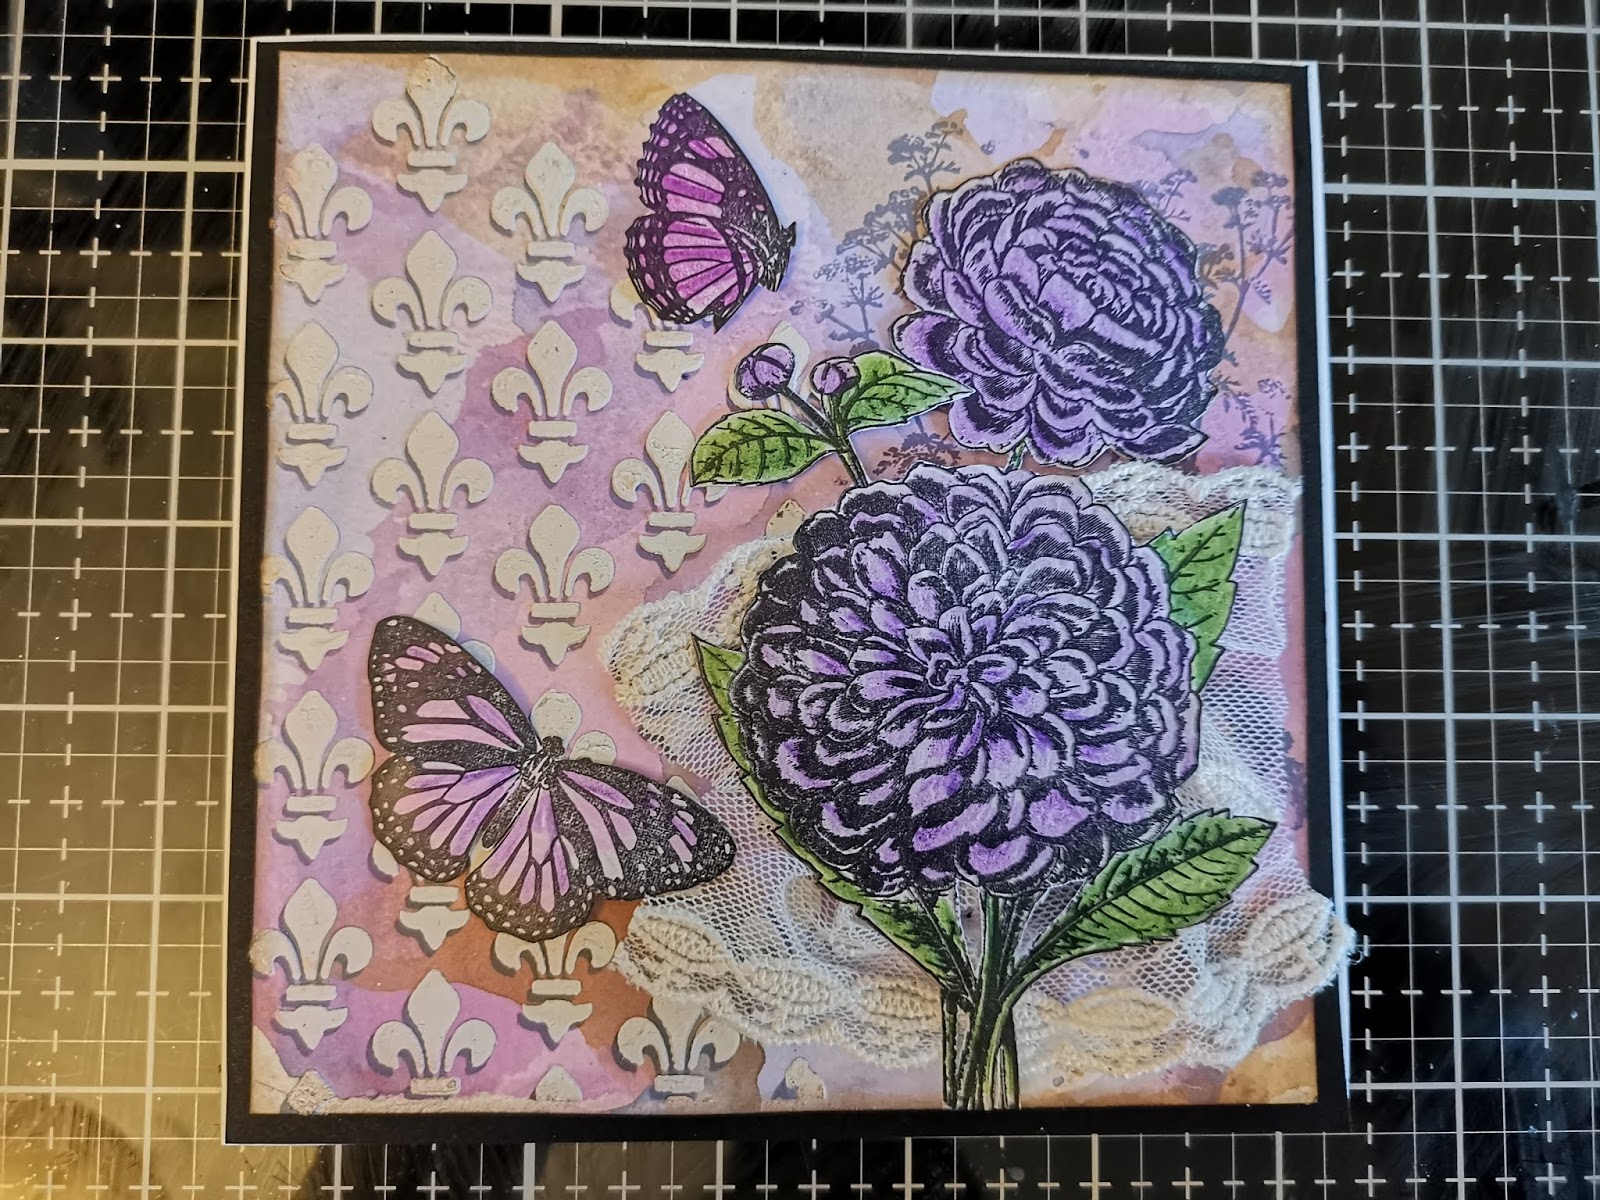
I started by creating a distressed background using Vintage Photo, Dusty Concord and Shaded Lilac Distress Oxides.  I then stencilled Hydrangea Archival ink through the Fleur de Lis stencil.  I bumped the stencil (moved up and slightly across) and stencilled through the same area using Grunge Paste.  This is a technique taught by Raquel herself (aka ScrapCosy).  This was then left to dry completely.


The butterflies and flowers were stamped and coloured using Polychromo pencils.  They were then fussy cut.  You know that I love a product if I am happy to fussy cut them - those who know me know that I have very little patience!


I then started to layer everything up, adding vintage lace behind the flower.  To finish this was mounted onto black card and then onto a card blank.

Here is the finished card


I actually recreated this card using different vintage lace.   I loved how subtle these turned out.

I had so much fun I created more cards too using the same technique.


I also used the vintage tea pot from the previous release.  These two releases work amazingly together.


As you can see I have been having bags of fun with my birthday presents.  Totally love them and I am so thankful to have such amazing friends in my life.

Thank you for joining me.  I would love you to leave a comment to tell me what you think of my play time!

Happy crafting!
Miriam


Monday 14 January 2019

New Sara Naumann PaprArtsy Products

Hi again,  I hope I wet your appetite a couple of weeks ago.  Tonight I can reveal my projects using the awesome new Sara Naumann stamps and stencils from PaperArtsy.  Sara has excelled herself as usual!


For my projects I used the shaving foam technique, which I had never tried before.  I must admit, I loved the swirling in the foam.


And the finished results were wonderful.  In fact, I made a batch of backgrounds at once and still have some for more projects.

So, how did I use them??


As I love to make ATCs, this was the perfect opportunity.


I loved using the new stamps and stencils.  They are pretty awesome.


They are also so detailed that I I kept my designs simple.


I also used one of the marbled backgrounds for a card.


For this card I used one of the amazing collaged stamps, cutting some of my marbled card for the wings.  The leaves stencil is perfect for this.  Bold and effective.

I really had such a great time using these products.  In fact, I have so many more ideas that I can't wait to try out.

Pop over to the PaperArtsy blog for a closer look.

Miriam

Sunday 13 January 2019

Country View Crafts Challenges

Thanks for joining me again.

Today I am sharing my second project of the month with you.


I started off by brayering Koala, Sea glass, Surfs Up and Twilight Fresco acrylic paints.


Next, I embossed a sheet of card with a Tim Holtz 3d folder .  These folders are amazing - the detail really is astonishing.  To highlight it more, I rubbed lightly with Treasure Silver.  I love looking at this!

The image from the Stampers Anonymous Tim Holtz Rockstar set was stamped using Archival ink.  This was then mounted onto another sheet of card.

A sentiment from Simple Sayings  was stamped and cut into a banner.


To finish, all of the elements were mounted together and a silver frame drawn before the final card was mounted onto a black card blank.

I hope you like my project and that I have inspired you to join in with the challenge.  Don't forget, there is a chance to win a gift voucher to spend in the on line shop.

Thanks for joining me.

Happy crafting!

Friday 11 January 2019

Beautiful Nature

I realised that I had not shared a series of cards that I created for Autumn.

I used the Tim Holtz Bigz leaf die and embossing folder, teamed with Distress Oxides, Micro Glaze resist and stencils.

Here are my leaves.


For the veins of the leaves I used a touch of distress crayon.

Here are the finished cards:


I had great fun making these.

Thanks for joining me.

Happy crafting!


Tuesday 1 January 2019

Country View Crafts Challenges

Happy New Year to you all.  I hope that you enjoyed the festive period.

The year has gone in a flash and I cannot believe we are into the first challenge of the month.  The first challenge is 'Landscapes / Cityscapes'.

Here is my first project


I started this project by using Distress Oxides in Chipped Sapphire, Scattered Straw and Brushed Corduroy.


I created my background using the wrinkle free distress method, drying each colour before using the next to avoid creating 'mud'.


I stamped the America cityscape from the Tim Holtz set.  I love this set.  So useful.


To finish, I die cut the lace in black card and added these to the top and bottom of the card.  I then mounted the card onto a sheet of black card stock.

I hope that I have inspired you to join in.  Don't forget to add your projects to the Country View Crafts blog.  You may be in with a chance to win a gift voucher to spend in the shop.

Happy crafting!
Miriam